
If you intend to make your space more beautiful and modern, understanding how to install Santa Luzia skirting boards is the first step to ensuring a flawless and professional finish. The brand’s skirting boards are recognized for their quality, durability and ease of installation, which make them ideal both for those involved in renovations and for those who like to get their hands dirty.
Why choose Santa Luzia skirting board
Before learning how to install Santa Luzia skirting boards, it is worth knowing the advantages that make this product one of the best choices on the market. Made of polystyrene (EPS), a lightweight, recyclable and moisture-resistant material, Santa Luzia skirting boards are ideal for those seeking beauty, sustainability and durability. They do not rot, do not mold and resist the effects of time very well, making them perfect for indoor environments that require frequent cleaning.
Another important difference is the finish. Most models are ready to install and require no painting or sanding. The brand features lines that vary between classic, modern and minimalist styles, with different heights and thicknesses, making it easy to harmonize with any decor. Furthermore, Santa Luzia is a traditional and reliable brand, which offers products compatible with different floors and coverings. This ensures that the skirting is solid, well fitted and visually balanced.
Preparation before installation
Knowing how to correctly install Santa Luzia skirting boards starts with good preparation. Before applying the product it is essential to check the type of wall, equip yourself with the appropriate tools and make sure that the environment is clean and level.
Tools and materials required
For a successful installation, you will need a few basic items:
- Miter saw (manual or electric, for precise cuts)
- Drill with a bit suitable for the type of wall
- Measure, pencil and level
- Rubber mallet or mallet
- Santa Luzia double-sided tape
- Super Santa Luzia sticker
- Santa Luzia stucco or caulking for finishing
- Santa Luzia T sockets (in case of masonry walls)
- Clean cloth or flannel for cleaning
These materials help ensure firmness and a professional finish.
Preparation of the environment
The wall on which the skirting board will be installed must be completely clean, dry and level. Remove paint residue, dust, loose cement and moisture. If the surface has irregularities, scrape slightly or correct with stucco before starting installation.
It is also important to correctly measure the perimeter of the room. Calculate the total length with a meter and add approximately 10% more to compensate for any losses due to cuts and adjustments. This way you avoid interruptions while working.
Santa Luzia skirting board installation phases
Now that everything is ready, it’s time to put into practice the step-by-step guide on how to install Santa Luzia skirting boards. Follow the steps calmly and carefully to ensure a beautiful and long-lasting result.
Remove old baseboards
If there are already baseboards, remove them carefully using a putty knife and small hammer. Do this slowly so as not to damage the wall. If your old baseboard is made of ceramic, porcelain or wood, you may need to use more force or specific tools. Once removed, clean the area well.
Create a positioning guide
Before applying the final skirting board, cut a piece of the bar and use it as an alignment guide. Place this sample against the wall and mark reference points every 40 centimeters or so. This will ensure that all pieces are aligned at the same level, preventing the finish from looking uneven.
Attach T-anchors (for masonry)
On masonry walls we recommend using T-bolts to make installation safer. Drill the marked points, insert the plugs and secure with appropriate nails or pins. This technique strengthens the adhesion of the skirting board and prevents it from detaching over time.
Apply double-sided tape and adhesive
If you prefer to avoid punctures, use the combination of Santa Luzia double-sided tape and Santa Luzia super adhesive. This technique is ideal for plaster walls, plasterboard or delicate coverings. Apply strips of masking tape to the back of the bar, spaced about 40 centimeters apart, then add drops of glue between the strips. Avoid removing the tape film before positioning the skirting board correctly, as this may cause misalignment. Once you are sure of the position, press firmly to secure it.
Place the bars and make changes
With the tapes and glue applied, align the baseboard to the wall and press firmly. Use a rubber mallet to adjust without damaging the material. At the joints, use additional glue and, if necessary, insert a support bushing between the bars to maintain leveling.
Cut and join the pieces
The joints between the bars require special attention. Makes 45-degree cuts for internal and external corners, ensuring a clean and aesthetic fit. For straight joints, use 90 degree cuts. It is important that all joints are well glued and aligned, as this makes a difference in the final result.
Conclude with finishing
After installing all the pieces, apply Santa Luzia putty or caulking to the joints, corners and any gaps. Remove excess with a damp cloth before the filler dries. If you wish, you can add a finishing touch by lightly sanding the seams to make them even smoother.
More tips for a perfect installation
Knowing how to install Santa Luzia skirting board is much more than simply following the steps. A little extra care ensures that the result is long-lasting and beautiful.
- Check leveling frequently, especially in large environments.
- Remove excess glue immediately to avoid stains.
- In areas with large temperature variations, leave a small expansion gap between pieces.
- Avoid installing skirting boards on newly painted or damp walls; wait for complete drying.
- On uneven floors use thin shims to compensate for small height differences.
- If you want to paint the skirting board, check whether the model you choose allows painting: some are ready-made and do not need to be repainted.
These guidelines help keep your baseboard solid and beautiful for much longer, as well as avoiding rework.
Installation of special models
Santa Luzia has different models, such as the reverse skirting board and the aluminum skirting board, which require small variations in the installation process. The NEO reverse skirting board, for example, is installed flush with the wall, creating a modern and discreet effect. In this case it is necessary to open a space in the wall to insert the profile, an operation that must be carried out with suitable tools and, preferably, by a professional.
Aluminum skirting boards, widely used in clinics and offices, can be attached with the same combination of double-sided tape and adhesive. The key is to keep the wall perfectly smooth and level, making sure the aluminum fits with no gaps. These special versions enhance the environment and offer a sophisticated finish, demonstrating the versatility of Santa Luzia products.
Care after installation
After installing all baseboards, wait at least 24 hours before doing a more thorough cleaning or moving furniture against the wall. This ensures complete polymerization of the glue and finishing putty. Daily cleaning can be done with a damp cloth and neutral soap. Avoid abrasive products or rough sponges as they can scratch the material. It is also important to avoid excessive use of solvents and alcohol. With these simple precautions, your skirting board will remain beautiful for many years, preserving the elegant look that Santa Luzia gives.

Photo: reproduction
Count on Rodapé Shop
At Rodapé Shop you will find the best models from the Santa Luzia line, as well as all the accessories necessary for installation, such as glues, tapes, plugs and fillers. Our official website offers a comprehensive catalog and detailed information to help you choose the right product for your environment. Furthermore, the Rodapé Shop blog is full of useful advice on finishes, decorations and maintenance. There you will find step-by-step guides like this one, always with clear and practical explanations to make your daily life easier.
Conclusion
Learning how to install Santa Luzia skirting boards is easier than it seems when you have the right tools and follow the steps carefully. From wall preparation to final finishing, every detail makes the difference in the result. Santa Luzia skirting boards are synonymous with quality and practicality, ideal for those who want to renovate the environment with a touch of refinement and durability.
With the products and indications of Rodapé Shop you have everything you need to obtain a professional result, even without being an expert. Remember: a good finish completely transforms the look of a space and adds value to the property.
Frequently Asked Questions (FAQ)
Can I install the Santa Luzia skirting board without drilling?
YES. The combination of double-sided tape and super adhesive is sufficient to fix the skirting board to smooth surfaces, such as plaster, plasterboard and ceramic, completely eliminating the use of plugs and screws.
Is it necessary to paint the skirting board after installation?
Most Santa Luzia models are ready to install, with a white and glossy finish. However, if you want to customize the color, check the product label to see if painting is allowed.
What to do if the floor is uneven?
On uneven floors, the ideal is to use small shims or adjust the cut of the bars so that the skirting board follows the slope. This prevents gaps and ensures the finish is uniform.
latest posts published

Necessary accessories for a perfectly functioning terrace
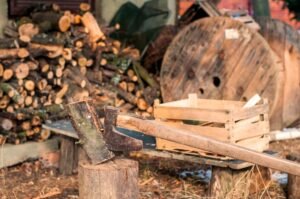
Ancient wood sources for authentic projects
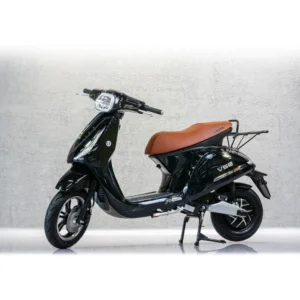
Tips for choosing an electric scooter

How do we preserve fruit and vegetables for the winter?

For a cleaner home: choose the most suitable vacuum cleaner!
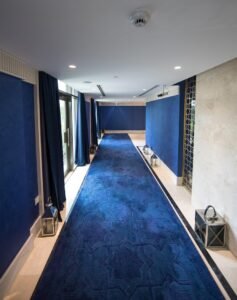
Special carpets for spaces with heavy traffic
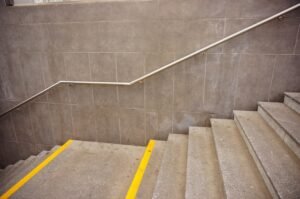
How to install LVT on steps with rounded edges
Design trends for colored rubber flooring
Antibacterial linoleum: safe option for schools and hospitals