The skirting board is an essential detail in the finishing of any environment, since in addition to adding aesthetic value to the space, it protects the walls from damage caused by impacts and dirt. Among the various options available on the market, MDF (Medium Density Fiberboard) skirting stands out for its versatility, durability and cost-benefit ratio. If you are planning to install MDF skirting boards, this comprehensive guide will help you carry out the process practically and efficiently. Here you will find all the steps, from the initial preparations to the final finishing, guaranteeing an impeccable result.
1. What is MDF and why choose skirting boards made from this material?
MDF, or Medium Density Fiberboard, is a material composed of wood fibers pressed with resins. It is widely used in furniture and trim manufacturing because it is durable, easy to work with and provides a great finish.. In the case of skirting boards, MDF is a popular choice for the following reasons:
- Versatility: It can be found in different sizes, styles and finishes, including lacquered versions, with friezes and also customizable.
- Ease of installation: MDF is lightweight and can be easily cut and adjusted as needed.
- Affordable cost: Compared to solid wood or porcelain skirting boards, MDF is more economical.
- Customization: It can be painted or varnished, allowing you to choose your desired color and finish to match the room.
With all these benefits, it’s no surprise that MDF is such a popular choice for baseboards. Now let’s explore the installation process step by step.
2. Required materials and tools
Before starting, it is essential to gather all the necessary materials and tools. This will make the process faster and more organized. You will need it:
- MDF skirting boards in the desired size and style;
- Tape measure or tape measure for accurate measurements;
- Saw or hacksaw to cut MDF to the required size;
- Contact glue or glue suitable for MDF;
- Screws or nails (optional, depending on the fixing method);
- Hammer, if you choose nails;
- Drill with bits, if screws are chosen;
- Level to ensure a straight installation;
- Putty for wood or MDF (to hide imperfections);
- Paint or varnish for finishing (if necessary);
- Paint brush or roller;
- Fine sandpaper for smoothing cuts;
- Protective gloves and safety glasses.
With everything at hand, you’ll be ready to begin the installation process.
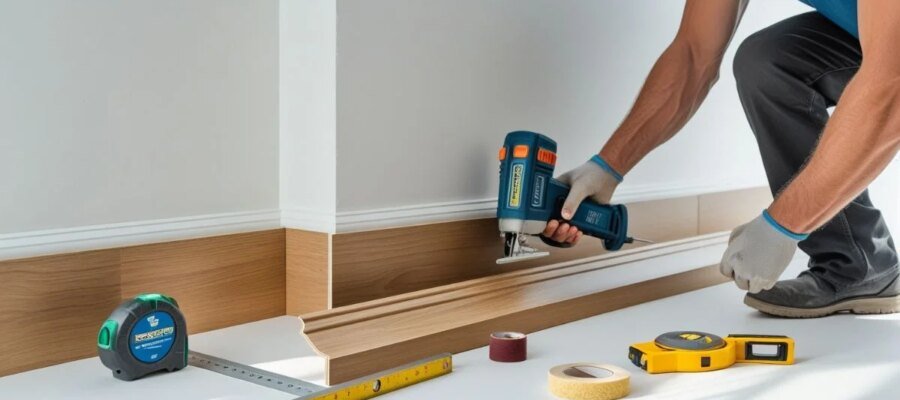
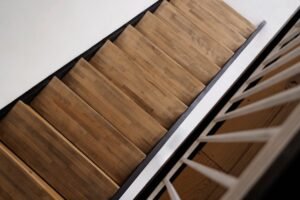
Photo: reproduction
3. Preparation of the environment
Before installing skirting boards it is important to prepare the area to avoid future problems. Follow these steps:
3.1 Cleaning the area
Make sure the floor and walls are clean and free of dirt or dust. This ensures that the skirting is well fixed and aligned.
3.2 Check leveling
Use the level to check that the floor is level. If there are any irregularities, they may affect the installation of the baseboard. If necessary, adjustments can be made with shims.
3.3 Measure the space
Use the tape measure to measure the perimeter of the walls and calculate the exact number of skirting boards you will need. Remember to add a few extra centimeters for cuts or adjustments.
4. Cutting the skirting boards
With the measurements in hand, it’s time to cut the MDF skirting boards to the required size. Use a hacksaw or hacksaw to make precise cuts, and for corners, make cuts at a 45-degree angle. This ensures that the skirting boards fit perfectly into the corners of the walls, providing a professional finish.
After cutting the pieces, gently sand the ends to remove any splinters and make the cuts more uniform.
5. Fixing the MDF skirting boards
There are two main methods for fixing MDF skirting boards: using glue or fixing with screws/nails. Choose the method best suited to your project.
5.1 Fixing with glue
- Apply contact glue or specific glue for MDF to the back of the skirting board.
- Press the baseboard against the wall and hold for a few seconds until it is firmly in place.
- This method is ideal for those looking for a quick installation without the need to drill into the wall.
5.2 Fixing with screws or nails
- Drill small holes in the baseboard and wall using the drill. Make sure the holes are aligned.
- Secure the skirting using screws or nails. Use the appropriate hammer or wrench to make sure they are secure.
- This method is recommended for areas where baseboards may experience impact or additional weight.
6. Finishing and painting
Once you’ve installed your baseboards, it’s time to take care of the finishing to ensure a flawless look.
6.1 Filling in the spaces
Use wood filler or MDF to fill any gaps between the baseboard and the wall or to cover screw/nail heads.
6.2 Sand the grouted areas
Once the filler is dry, lightly sand the surface to make it even.
6.3 Painting or varnishing
If the baseboard is unpainted, apply paint or varnish to give it the desired finish. Use a brush or roller to get even coverage and let dry completely before touching the pieces.
7. Extra tips for a perfect result
- Take care of cleanliness during the process: Working in a clean space prevents dirt from getting trapped in the glue or paint.
- Choose quality materials: Invest in good quality glue and caulk to ensure durability.
- Plan the details: If the wall has outlets or switches, measure and cut the baseboards appropriately to accommodate them.
- Respect the drying times: Do not touch the baseboard or paint until they are completely dry.
8. Why install MDF skirting boards?
In addition to protecting walls from damage and dirt, MDF skirting boards add a sophisticated touch to the space. They can be used in different decoration styles, whether in modern, classic or minimalist spaces. Additionally, they are easy to install and maintain, making them an excellent option for residential and commercial projects.
Conclusion
Installing MDF skirting boards is a convenient and rewarding task, even for those who don’t have much DIY experience. By following this guide you will have all the information you need to do the job efficiently, guaranteeing a beautiful and long-lasting result. With a little patience and the right materials, your space will acquire a new look, adding value to the environment by highlighting the finish of the floor and walls.
To find the best skirting boards you must visit the Rodapé Shop website, there you will find a wide variety of skirting boards.
Frequently asked questions
What are the benefits of using MDF skirting boards in a project?
MDF skirting boards are widely used due to their versatility and cost-effectiveness. They offer numerous advantages, including ease of installation, as the material is light and easy to handle. Plus, MDF is highly customizable: you can paint or lacquer it to match your room’s decor. It’s also a more affordable choice than other materials, such as solid wood or porcelain tile. Another feature is its durability, especially when MDF is coated or waterproofed to resist moisture. The modern aesthetic and elegant finishes ensure it fits into a variety of decor styles
What precautions should be taken when installing MDF skirting boards?
Installing MDF skirting boards requires attention to important details. First of all, the environment must be clean and level to avoid failures during installation. Use suitable tools such as saws for precise cuts and ensure that the skirting boards are secured with high-quality glue or screws as needed. Another fundamental point is to pay attention to humidity: MDF is a material that can swell if exposed to water. It is therefore advisable to waterproof it before installing in areas subject to humidity, such as bathrooms. Finally, it is essential to make adjustments to the corners and edges, using 45 degree corner cuts to achieve a flawless finish.
How to ensure a good finish after installing MDF skirting boards?
A good finish makes a difference in the final aesthetics of the skirting board. After installation, use a filler suitable for MDF to fill any gaps between the baseboard and the wall or to cover exposed screws. Gently sand the filled areas to even out the surface before painting. If your baseboards aren’t pre-painted, apply a paint or varnish that matches the room’s decor. Use quality brushes or rollers to ensure even coverage. Also respect the drying times indicated by the paint manufacturer to avoid stains or damage to the finish.
latest posts published

Necessary accessories for a perfectly functioning terrace

Ancient wood sources for authentic projects

Tips for choosing an electric scooter

How do we preserve fruit and vegetables for the winter?

For a cleaner home: choose the most suitable vacuum cleaner!
Special carpets for spaces with heavy traffic
How to install LVT on steps with rounded edges
Design trends for colored rubber flooring
Antibacterial linoleum: safe option for schools and hospitals