Protecting your baseboard before painting is a small step that makes a huge difference in the final result: it prevents spills, preserves the finish, reduces rework and ensures clean lines between wall and baseboard. In this direct and objective guide, aimed at Rodapé Shop customers, you will find everything you need to know about how to protect skirting boards for painting: from the initial preparation to the removal of the protections and the finishing touches.
Why protecting your baseboard is essential
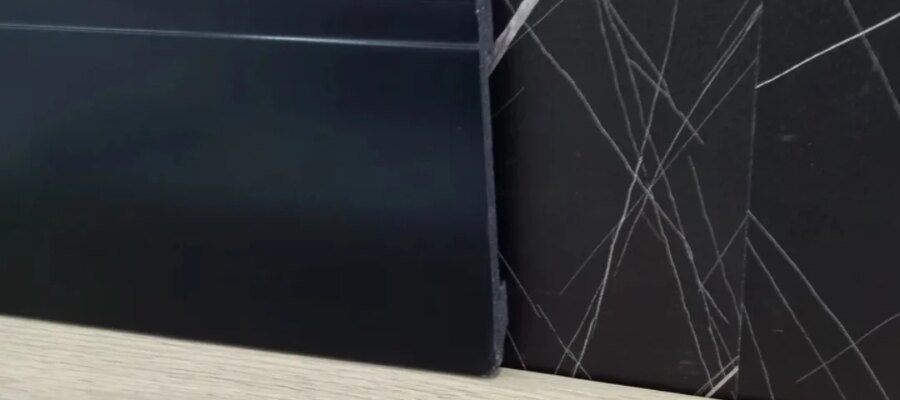
Protecting the skirting board is not just an aesthetic issue: it saves time and money. When the protection is done well, difficult to remove stains, possible additional sanding and even the need to repaint the skirting board itself are avoided. Many baseboards receive a specific finish (paint, polyurethane varnish, or texture), and a drop of wall paint may require extra work to restore the surface. Furthermore, the protection ensures that the boundaries between the wall and the skirting board are clear, giving a professional look to the room. For those who appreciate every detail of the renovation, this step is as important as the choice of color or paint.
Practical materials you should have on hand
Before you begin, select the appropriate materials to ensure effective protection. Get good quality masking tape or painter’s tape (preferably wide), plastic or canvas to cover the floor, cardboard or thin boards if you need to protect specific areas of the floor, and a plastic mask (masking film) to quickly cover larger sections. Also get some putty to repair imperfections, medium to fine sandpaper, primer if the baseboard is rough or very porous, an angled brush for precise cutting and a roller or an additional brush for larger areas. The combination of these elements allows you to work with organization and speed, reducing the possibility of error.
Skirting board preparation: cleaning and small repairs
Before applying any protection it is essential to prepare the surface. Clean the skirting board from dust, grease and dirt with a damp cloth and neutral detergent; Dirty surfaces compromise the adhesion of the tape and the quality of the paint. Next, inspect the baseboard for nail holes, chips, or small cracks. Use repair putty to fill these defects, and after the putty has dried, smooth it out with fine sandpaper to make everything smooth. If the skirting board is made of raw wood or has stains, the application of a primer is recommended to uniform and improve the adhesion of the paint that will be applied, preventing the old stains from “seeping” through the new layer.
Positioning and applying the adhesive tape
The most delicate step is to stick the tape in the right place. Place the tape at the junction between the skirting board and the wall or between the skirting board and the floor, depending on which line you want to protect. For a cleaner result, apply the tape in continuous sections rather than in several small pieces – this reduces the gaps between the joints. After positioning, press the edge of the tape firmly with a putty knife, ruler, or even a blunt blade to seal the tape against the baseboard; This measure prevents the paint from infiltrating underneath. Work calmly on corners and curved profiles, making small adjustments so that the tape follows the contour perfectly. Correctly applied tape is the main guarantee of straight and smudge-free lines.
Complementary protection: plastic, canvas and masks
In addition to tape, use plastic or burlap to cover the floor near the baseboards. This is important to prevent spilled liquids from spreading over larger areas of the floor and causing extensive soiling. If you need to quickly cover windows, doors or large surfaces, plastic masking film is a practical solution: it adheres easily and protects large surfaces in less time than loose plastic. On more delicate floors, such as carpet, consider using thin sheets of cardboard or placing a screen between the baseboard and the floor to prevent spilled liquids from reaching the fabric. This additional protection is especially useful on jobs involving spraying or painting with a higher risk of spatter.
Protected skirting painting techniques
With your skirting well protected, start with a precision cut: use a quality angled brush to trace the line between wall and skirting, always working with long, firm strokes to avoid spills and ensure uniformity. After cutting, apply the paint to larger areas with a small roller or brush suited to the type of baseboard. If you have applied primer, respect the recommended drying time before applying the final paint. For baseboards with deep profiles or recesses, a thin brush helps you reach the corners without building up paint. Work in sections and keep your hand steady: safe movements reduce spatter and improve the finish.
Tape removal and immediate care
Correct removal of the tape is as important as its application. Ideally, remove the tape as soon as the paint is dry to the touch, but before it has fully hardened, to prevent the tape from absorbing paint particles as well. Pull the tape slowly, at a low angle, maintaining a continuous, controlled motion. If the tape is tough, use a dull blade to slightly separate the paint from the tape as you pull to prevent chipping. After removing the tape, do a final inspection: small flaws can be corrected with a fine brush and occasional touch-ups: this final finish makes all the difference in the look.
Touch-ups and final cleaning
After removing the protector, check for any spills, defects or unwanted bumps. Use fine sandpaper to smooth out small imperfections and apply touch-ups with an appropriate brush. If there is excess paint on the floor, wipe up the spill with a damp cloth before it dries completely; Dried spills may require scraping or solvents, depending on the type of paint and floor material. Clean tools immediately after use, following the paint manufacturer’s instructions for solvents or water, and store materials in a dry place for future use. A thorough final cleaning ensures that the environment is presentable and ready for use in a short time.
Good practices that save time and guarantee quality
A few simple practices help speed up the job and protect your investment: invest in good quality tape: it costs a little more, but prevents leaks and makes removal easier; always apply the tape in continuous sections and press the edges well; use a plastic mask when there are larger areas to cover; and don’t skip the step of cleaning and repairing your baseboards, as well-prepared surfaces accept tape and paint much better. For those painting multiple pieces or rooms, maintain an organized flow: prepare the baseboard, protect the floor, cut, paint and remove tape systematically to avoid confusion.
Advantages for those who purchase with Rodapé Shop
Following this process not only makes the space beautiful, but also preserves your investment in quality baseboards. At Rodapé Shop we try to offer products that benefit from a well-crafted finish: whether it is MDF, PVC, polyurethane skirting or other materials, adequate protection prevents damage and extends the useful life of the finish. By applying the tips in this guide you can ensure that any skirting board retains its appearance and functionality for longer, increasing the value of your property and reducing future maintenance costs.
Direct conclusion
Protecting your baseboard before painting it is a small step that produces big results. With the right materials (painter’s tape, plastic or plastic mask, repair putty, primer when necessary, appropriate brushes) and following the sequence: clean, repair, protect, cut, paint and remove protector at the right time, you can achieve a clean, professional finish. These practices save time, preserve baseboards and improve the environment. For more content and practical advice on skirting and trim, visit the blog and check out our products in store. Rodapé Shop is here to help you take care of the details of your renovation with clarity, respect and quality.

Frequently Asked Questions (FAQ)
Can I paint without using tape?
Yes, those with practice can achieve acceptable finishes using only an angled brush and careful technique. However, tape greatly reduces the risk of failure and is recommended to ensure sharper lines and avoid rework.
How long to wait before removing the tape?
Ideally, remove when the paint is dry to the touch, but not fully cured. This prevents the tape from pulling on wet paint when removed. The exact time depends on the paint and drying conditions; observe the touch and remove carefully.
How to protect skirting boards on delicate floors such as carpet?
Use sheets of thin cardboard or specific protection between the carpet and the baseboard and apply the tape carefully so that it does not lift fibres. If you will be using spray paint, choose tightly secured plastic covers to prevent paint from reaching the fabric.
latest posts published

Necessary accessories for a perfectly functioning terrace
Ancient wood sources for authentic projects

Tips for choosing an electric scooter

How do we preserve fruit and vegetables for the winter?

For a cleaner home: choose the most suitable vacuum cleaner!

Special carpets for spaces with heavy traffic
How to install LVT on steps with rounded edges
Design trends for colored rubber flooring
Antibacterial linoleum: safe option for schools and hospitals